Tile Installation
KR Tile & Stone provides the greater Los Angeles area with products that will add a shine to your location. It is the best tile fabrication and installation service around. Business-installation projects may seem to be a little terrifying or overwhelming but KR Tile & Stone will be there to help you with remodeling or will even help you start from scratch. Our team of professionals and experts will conduct a plan, acquire the best material, and have perfect execution.
Take the time to look through the gallery so you can get a visual of the professionalism and elegance KR Tile & Stone provides.
Our team is always learning new techniques and strategies to perform the highest quality tile installation job. Through the development of the company the team has created a method of training to guarantee that all the skilled masons accomplish a high-end job. Each member is very experienced and knowledgeable of the tile industry, being the reason why they have been chosen to join the team. You will not be disappointed but relieved you chose our team, we’ll deliver quality and take on any of your projects.
Tile and Stone Installation Locations:
Private Homes
Offices
Restaurants
Hotels
Small and Big Businesses
Nationwide Stores
Shopping Malls
Apartment Buildings
Tile and Stone Installation Locations:
Kitchen Sinks
Kitchen Countertops
Backsplashes
Bathroom Jacuzzis
Showers
Bathrooms
Bathtubs
Living Rooms
Cocktail Bars
And More!
5 Important Steps to Install Tile

Take exact measurements of the area you are planning on covering. If you have inaccurate measurements, the outcome can end up being very devastating. Whenever you cut a piece too small it will and can end up being a useless piece. If you cut a piece and leave it too big it can make your work look very unprofessional and sloppy. Our team of trained masons has the best equipment to prevent errors and to create a blueprint.

Prepare the surface area in which you are planning to cover. A member of the team will show up to your house, before the installment, to make sure that all outlet covers, switch plates, and all hardware covers are removed. If this step is ignored then you might encounter some damage to the stone and tile. For better quality, all surfaces will be sanded with coarse-grit sandpaper. We want to make sure that the stone is going to be strong and adhesive to the surface. (Specifically for a backsplash)

With a proper trowel add mortar or mastic to the surface, making sure it’s enough for 6-8 tiles at the most. If we are installing tile on the wall our team will add mortar in long. All tiles will be added to the straight edge first, preventing mistakes such as crooked surfaces.

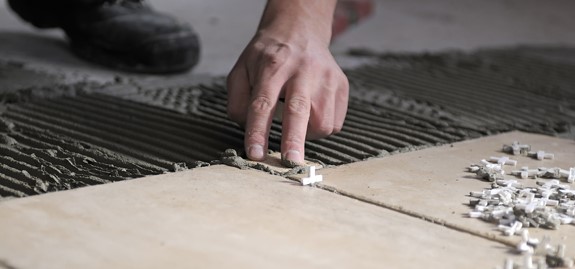
Cutting and Installing the Tile. The tiles pieces must be put into the mortar, by using a spacer you will be able to separate all tiles evenly. Tile that needs to be cut in a straight line must be cut with a tile cutter, and if you want some sort of design then you must use a special wet tile saw.

Grouting the Joints between all tiles is the last step. Within 24 hours the mortar will dry up and after it drys you will be able to continue adding the grout.
Grouting Tips You Should Know
- If joints are wider than 1/8 inch you should use sanded grout.
- If joints are 1/8 inch or less it is recommended to use un-sanded grout.
- Make sure to read the manufacturer’s directions before proceeding, should include grout pack instructions.
- The best way to mix the grout is either in a clean plastic bowl or in a bucket.
- When applying the grout, use a rubber grout float, scoop a small amount of the grout, and apply it along the tile joints.
- Each joint should be applied individually. Always make sure to press down during this process to avoid air bubbles from forming.
- After filling the joints up with grout, clean the tiles without touching the joints by rubbing gently with a sponge and water. After 30 minutes it should dry.
FREE ESTIMATE
Leave us a message and we’ll get started on your free estimate
Free Estimate
"*" indicates required fields
Or give us a call:
5 Important Steps to Install Tile
If you need any additional information don’t forget to give us a call! Our team is always ready to tackle any questions

